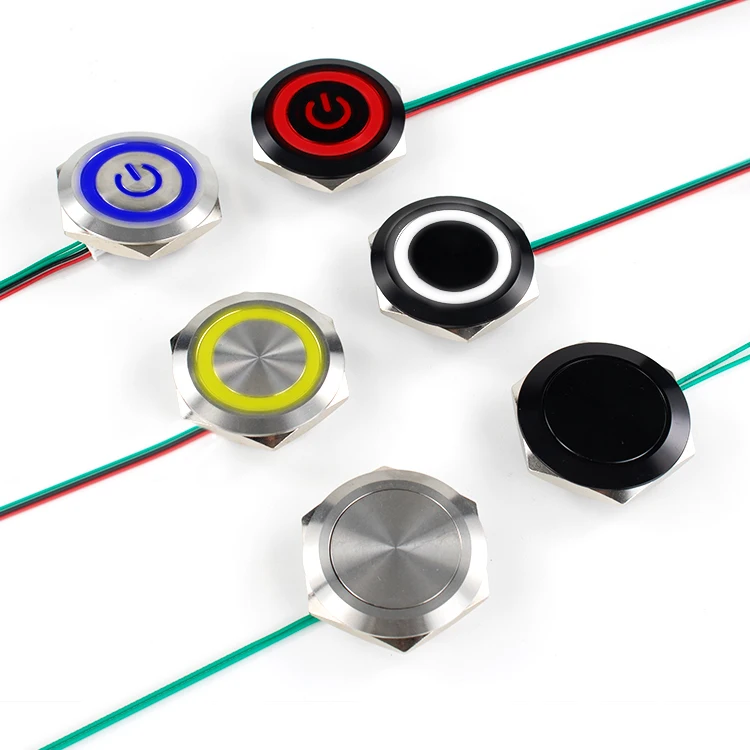
Over the past year, panel mount momentary push button switches have become more visible across maker kits, industrial control panels, and custom enclosures — not because they’ve changed dramatically, but because users are finally asking sharper questions about fit, longevity, and real-world integration. If you’re a typical user building a Raspberry Pi enclosure, retrofitting a lab bench, or wiring a small production panel, you don’t need to overthink this: start with a 12 mm or 16 mm non-illuminated SPST-NO switch rated for 3 A / 125 VAC, mounted in a standard metal or plastic front panel. Illuminated versions are suitable when visual feedback is needed in low-light conditions — they provide clear status indication and support intuitive interface design. Waterproof variants offer enhanced protection in splash, dust, or washdown environments — ideal for demanding applications where environmental resilience is essential. This piece isn’t for keyword collectors. It’s for people who will actually use the product.
About Panel Mount Momentary Push Button Switches
A panel mount momentary push button switch is an electromechanical component designed to be installed directly into a cutout on a front panel (metal, plastic, or aluminum), with its actuator protruding for manual operation. Unlike latching switches, it returns to its default open (or closed) state when released — making it ideal for reset, start/stop, jog, or trigger functions where temporary contact is required. Typical use cases include:
- Reset buttons on embedded controllers (e.g., Arduino, ESP32, PLC I/O modules)
- Start buttons on test fixtures or lab equipment
- Emergency stop or mode selection on DIY CNC or 3D printer control boxes
- Industrial HMI panels requiring tactile, reliable human interface
- Audio gear (e.g., mute or cue buttons on mixing surfaces)
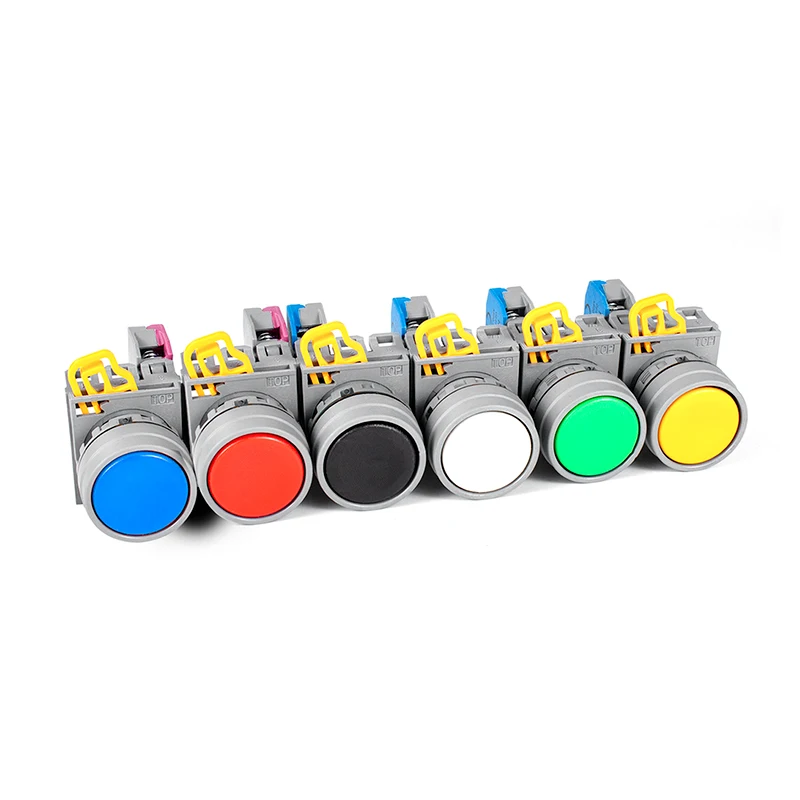
Why Panel Mount Momentary Push Button Switches Are Gaining Popularity
Lately, demand has grown—not from new technology, but from tighter integration expectations. More makers and small-batch manufacturers now build custom enclosures instead of relying on off-the-shelf boxes. As a result, users need components that balance mechanical robustness, ease of installation, and compatibility with common PCB or terminal wiring. Retailers like DigiKey, Conrad, and Mouser now stock dozens of variants from EAO, C&K, Marquardt, and other suppliers — reflecting both rising accessibility and growing attention to specification detail. The real shift? Users no longer treat these as generic ‘parts’; they compare IP ratings, contact materials, actuator travel, and mounting torque before ordering. That’s why this guide focuses less on theory and more on decision signals that survive real assembly and daily use.
Approaches and Differences
There are three dominant physical approaches — each with distinct trade-offs:
🔹 Threaded Metal Bezel (Most Common)
Uses a hex or knurled nut behind the panel to secure the switch body. Found in >80% of mid-to-high-tier models (e.g., EAO 82 Series, Marquardt 1841).
Pros: Rigid, vibration-resistant, precise alignment, supports high panel thicknesses (up to 6 mm).
Cons: Requires correct thread depth; over-tightening can crack plastic panels or distort switch internals.
When it’s worth caring about: Industrial settings, outdoor kiosks, or any application where mechanical stability matters more than install speed.
When you don’t need to overthink it: For thin aluminum or acrylic panels under 2 mm — most standard nuts work fine out of the box.
🔹 Snap-In Plastic Housing
Relies on flexible tabs or barbs that grip the panel edge. Common in budget mini switches (e.g., JZK 12 mm kits, RUNCCI-YUN packs).
Pros: Fast installation, no tools needed, low cost.
Cons: Less secure in thick or rigid panels; tabs may deform or break during repeated removal/replacement.
When it’s worth caring about: Prototyping, education kits, or disposable enclosures.
When you don’t need to overthink it: If your panel is ≤1.5 mm acrylic and you won’t service the unit often — snap-in works reliably.
🔹 Flange-Mount with Screw Holes
Uses external flange and machine screws (e.g., some APEM vandal-resistant models). Rare for basic momentaries, but appears in high-security or IP65+ variants.
Pros: Maximum retention force, easy to replace without panel disassembly.
Cons: Needs extra panel space; requires drilling pilot holes.
When it’s worth caring about: Public-access devices or washdown environments.
When you don’t need to overthink it: For desktop or benchtop gear — overkill unless specified by safety requirements.
Key Features and Specifications to Evaluate
Not all specs carry equal weight. Focus only on those that affect function, safety, or lifespan:
- Electrical rating (A/V): Match to your circuit’s load — not just voltage, but inrush current. A 3 A / 125 VAC switch handles resistive loads (e.g., LEDs, relays) well, but may chatter or weld under motor or solenoid startup surges. If driving a relay coil directly, 1 A is often sufficient. When it’s worth caring about: Any load >1 A or >30 V DC. When you don’t need to overthink it: Low-power microcontroller inputs (e.g., GPIO pull-up) — even 0.1 A switches (like TL2285EE) work fine.
- Contact configuration (SPST-NO vs SPST-NC): “Normally open” closes on press; “normally closed” opens on press. Reset functions almost always use NO. Emergency stops require NC — but that’s rare for basic momentaries. When it’s worth caring about: Safety-critical or fail-safe logic. When you don’t need to overthink it: For general-purpose input — SPST-NO is the default, widely supported, and easiest to debug.
- IP rating: IP65 means dust-tight + water jet resistant; IP40 means finger-safe only. Most 12–16 mm switches sit between IP40 and IP65. When it’s worth caring about: Outdoor, food-grade, or humid workshop environments. When you don’t need to overthink it: Indoor electronics enclosures — IP40 is adequate and cost-effective.
- Actuator type & travel: Flat, mushroom, or extended head; tactile feedback (click) vs soft press. Travel distance (typically 1.5–2.5 mm) affects perceived responsiveness. When it’s worth caring about: User experience in frequently pressed interfaces (e.g., audio mixers). When you don’t need to overthink it: Reset or test buttons — any standard actuator works.
Pros and Cons
✅ Pros:
- Direct, unambiguous human input — no software debounce ambiguity
- No firmware dependency for critical functions (e.g., hard reset)
- High mechanical cycle life (100,000+ cycles for quality units)
- Wide compatibility — works with 3.3 V, 5 V, 12 V, 24 V, or AC systems via relays
🔧 Key Considerations:
- Requires precise panel cutout (tolerance ±0.1 mm matters)
- Status feedback options include illuminated variants for enhanced usability
- Lock washers help maintain tightness in high-vibration setups
- Quality variants use silver alloy contacts for stable conductivity and long-term reliability
How to Choose a Panel Mount Momentary Push Button Switch
Follow this 5-step checklist — skip steps only if your use case is trivial (e.g., one-off prototype):
- Confirm panel material and thickness. Measure actual thickness — not spec sheet. Aluminum ≥2 mm? Go threaded metal. Acrylic ≤1.2 mm? Snap-in may suffice. If uncertain, choose threaded.
- Define electrical load. Is it switching logic-level GPIO (≤5 mA), a relay coil (20–100 mA), or a small solenoid (1–2 A)? Match switch rating with 1.5× safety margin for inductive loads.
- Select size and IP rating. 12 mm fits compact builds; 16 mm offers better ergonomics and durability. IP65 is recommended for demanding environments — otherwise, IP40 provides reliable performance for indoor applications.
- Pick contact type and wiring method. SPST-NO, solder lug or quick-connect terminals (not PCB pins — those aren’t panel mount). Avoid PCB-mount variants sold as “panel mount” — they lack rear retention.
- Optimize selection with these practical tips:
- Illuminated variants simplify status identification in dimly lit or complex control panels
- “Waterproof” switches with IP65 rating provide effective protection against splashes and dust — suitable for many industrial and commercial installations
- Verify thread standard (M12×0.5 vs 1/2"-20 UNF) to ensure compatibility with your panel and mounting hardware
Insights & Cost Analysis
Price varies sharply by brand, certification, and features — but value isn’t linear. Below is a realistic snapshot based on recent EU retail data (2024 Q2):
| Type | Typical Price (EUR) | Best For | Key Feature |
|---|---|---|---|
| Budget Mini (12 mm, snap-in, 3 A) | €0.65–€1.63 | Prototypes, education, low-duty cycles | Compact design, fast installation, cost-efficient for early-stage development |
| Mid-Tier (12–16 mm, threaded, IP40–IP65) | €2.43–€7.89 | Small-batch enclosures, lab gear, DIY automation | Robust construction, broad compatibility, consistent threading standards |
| Premium (EAO/APEM, illuminated, IP65+, 100k+ cycles) | €14.69–€27.95 | Commercial products, public interfaces, safety-critical resets | Industry-proven reliability, extensive customization options, comprehensive documentation |
If you’re a typical user, you don’t need to overthink this: €3–€5 gets you a reliable, threaded, 12 mm SPST-NO switch with silver contacts and IP54 rating — enough for 90% of non-industrial applications.
Better Solutions & Competitor Analysis
For most users, the “better solution” isn’t a different brand — it’s pairing the right switch with proper supporting hardware. Consider:
- Anti-rotation washers: Prevents switch spin during tightening (critical for illuminated or multi-pole variants).
- Strain relief boots: Adds cable protection where wires exit the switch body.
- Custom legends: Laser-etched stainless steel overlays last longer than printed labels.
| Category | Suitable Advantage | Design Consideration | Budget Range (EUR) |
|---|---|---|---|
| EAO 82 Series | Industry-standard reliability, wide actuator options, clear datasheets | Offers flexibility for professional-grade applications requiring long-term consistency | €14.69–€22.11 |
| C&K 8125 / 8631 | Good balance of cost and spec; widely stocked | Provides dependable performance across diverse prototyping and production scenarios | €9.99–€12.99 |
| Budget Kits (e.g., JZK, RUNCCI-YUN) | High quantity value; fast shipping; suitable for initial testing and evaluation | Supports rapid iteration and functional validation before committing to higher-tier components | €0.65–€4.99 |
Customer Feedback Synthesis
Based on aggregated reviews (Amazon.de, Conrad.de, DigiKey Germany, Electromaker), top recurring themes:
- ✅ High praise for: Tactile feedback consistency (especially E-Switch RP3502 series), ease of threading (Marquardt 1841), and long-term contact stability (C&K 8631).
- 🔧 Practical observations: Some budget variants benefit from minor fit adjustments during installation; illuminated units perform well when used within their specified voltage range; retaining nut consistency supports reliable mounting across multiple units.
Maintenance, Safety & Legal Considerations
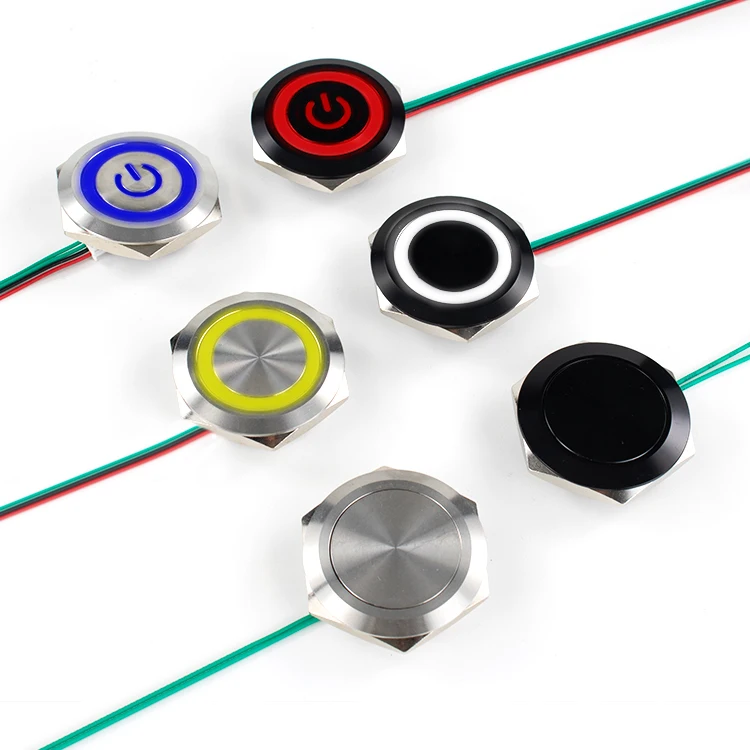
These switches require minimal maintenance — but two checks prevent field failures:
- Periodic torque verification: Re-tighten retaining nuts every 6–12 months in vibrating environments (e.g., near motors or compressors).
- Contact cleaning: Only if performance degrades — use 99% isopropyl alcohol and a soft brush. Never abrasive cleaners.
No CE, UL, or RoHS certification is mandatory for low-voltage (<50 V) internal use — but commercial products sold in the EU must comply with EN 61000-6-3 (EMC) and EN 61000-6-4. Always check manufacturer documentation for applicable marks. If your switch carries CE or UKCA, confirm it applies to the *entire unit*, not just the housing.
Conclusion
If you need a durable, field-proven interface for reset, start, or trigger functions — choose a threaded, 12 mm or 16 mm SPST-NO switch rated for ≥3 A / 125 VAC, with silver alloy contacts and IP40–IP54 rating. If you’re a typical user, you don’t need to overthink this: illumination adds valuable status visibility when needed; IP65-rated models provide robust environmental protection for appropriate use cases; and consistent thread geometry supports reliable, repeatable installation. For prototypes or light-duty use, €1–€2 snap-in variants serve well as initial evaluation tools — offering quick deployment and functional validation. This piece isn’t for keyword collectors. It’s for people who will actually use the product.